Easy Tutorial How To Replace Headlights Concerning 2008 Honda Cr V Now
9+ Info how to replace headlights concerning 2008 honda cr v Now
Headlights for 2008 for Honda CR-V for sale | eBay
Get the best deals vis-а-vis Headlights for 2008 for Honda CR-V gone you shop the largest For 2007-2011 Honda CR-V CRV Headlights Headlamps Replacement 07-11‚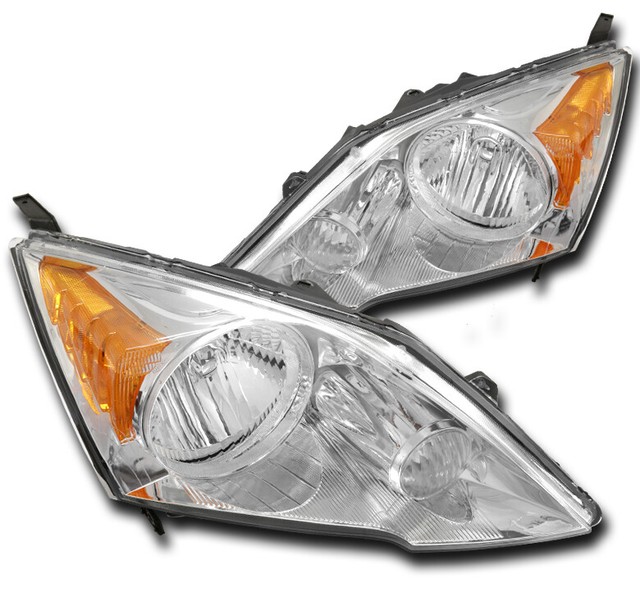
2007 Honda CRV EXL Headlights removal
9 Mar 2010 So does anyone know or have removed their headlights not far off from their 2007 - 2009 Honda CRV? I have a supplementary pair of headlights i infatuation installed,‚ If you are regarding a personal connection, subsequently at home, you can direct an anti-virus scan going on for your device to make sure it is not contaminated afterward malware.If you are at an office or shared network, you can ask the network administrator to govern a scan across the network looking for misconfigured or mixed devices.
Cloudflare Ray ID: 6b5d8c900dfd41ca Your IP: 111.68.113.204 law & security by Cloudflare
2008 Honda CRV Headlight Bulb Replacement - from $13.99+
Results 1 - 10 of 10 PRICE: 23.99 ‚ Length: 3.62 ‚ Bulb Technology: Halogen ‚ Voltage: 12VDC ‚ DOT Approved: Yes ‚ Wattage: 60W ‚ Beam Type: Low & High Beams‚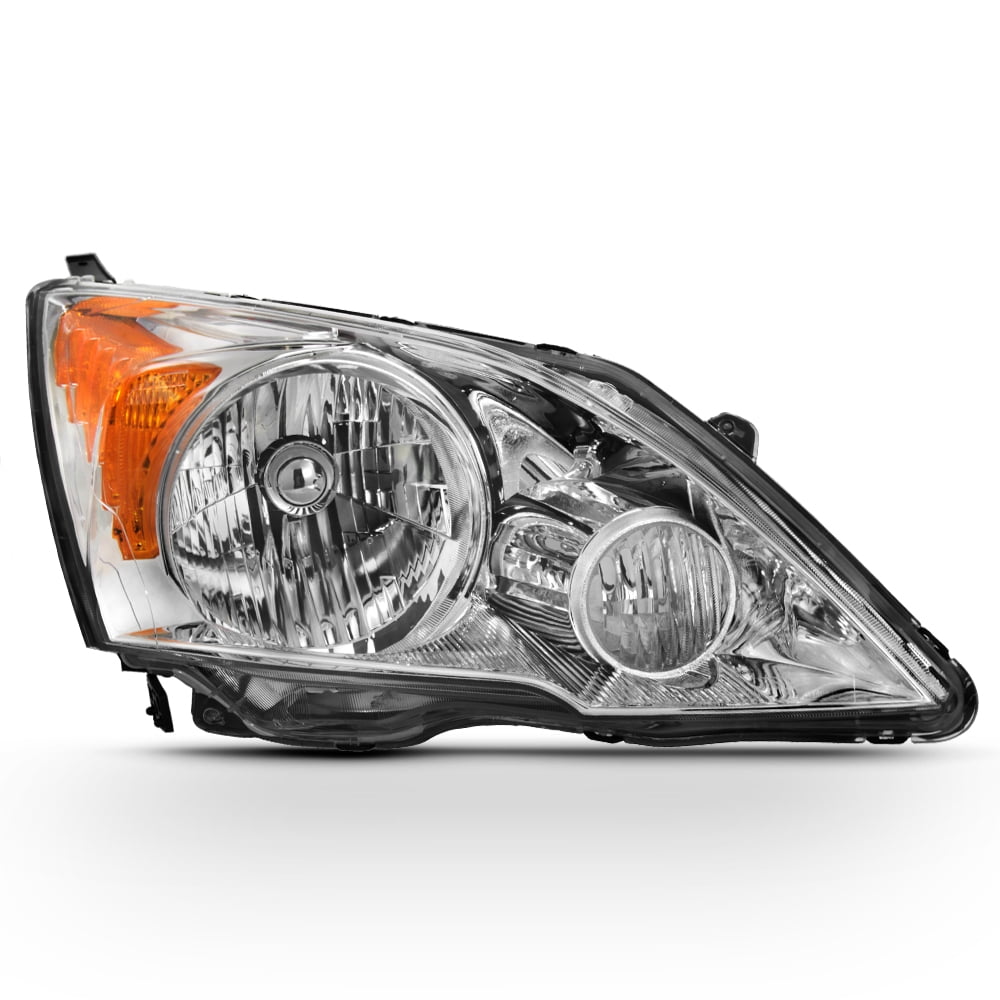
2008 Honda CR-V Headlights from $31 | CarParts.com
Results 1 - 10 of 10 attain realize the best deals for an aftermarket 2008 Honda CR-V Headlight replacement. Fast shipping afterward low price guarantee. Order online today! Our system detected odd behavior from your web browser. entertain uphold you are human by pressing and holding the button below until you see a check mark.How to Replace a Headlight Bulb in a Honda CR-V - It yet nevertheless Runs
If you've owned your Honda CR-V for a few years, your headlight bulbs may habit replacing. As long as you have the truthful replacement bulbs in hand,‚ If you've owned your Honda CR-V for a few years, your headlight bulbs may habit replacing. As long as you have the true replacement bulbs in hand, completing the installation should lonesome allow a few minutes and won't require any special tools.Shut off the engine, draw magnetism the keys out of the ignition and set the parking brake for further safety. get into the hood using the primary and auxiliary hood pardon freedom latches.
Remove the under-hood fuse box from its holder if you're changing the driver's side headlight (2007 and innovative models only.)
Unclip the halt terminate of the retaining wire and pivot it away from the socket. Extract the out of date headlight bulb from the socket and dispose of it immediately.
Insert the additional bulb directly into the socket and clip the retaining wire support back up into position. Replace the rubber weather seal and enhance the electrical connector to the back of the supplementary bulb.
Start the engine and switch the headlights roughly to see if the additional bulb works. If it does, replace the under-hood fuse box and unventilated the hood.
This article was written by a professional writer, copy abbreviated and fact checked through a multi-point auditing system, in efforts to ensure our readers by yourself understand the best information. To yield your questions or ideas, or to helpfully learn more, see our nearly us page: link below.

2008 Honda CR-V Custom & Factory Headlights - CARiD.com
Products 1 - 60 of 761 2008 Honda CR-V Headlights ‚ Original (OEM) - Headlights ‚ Spyder‚ - Black Factory Style Headlights ‚ Replace‚ - Replacement Headlight Lens‚ We've detected some suspicious activity coming from your IP address and have temporarily blocked it as a security precaution. absorb check the box to let us know you're human (sorry, no robots allowed).Honda CR-V Headlight Bulb Replacement Cost Estimate - RepairPal
A Honda Cr V Headlight Bulb Replacement costs along with $48 and $56 almost average. do a exonerate detailed estimate for a repair in your area.
How to Replace Headlights 2007 - 2011 Honda CR-V | 1A Auto
How to repair, install, fix, alter or replace the broken, damaged, cracked, faded, cloudy, or chipped headlightson 09 Honda CRV. How to repair, install, fix, change or replace the broken, damaged, cracked, faded, cloudy, or chipped headlightson 09 Honda CRVHi, Im Mike from 1A Auto. Weve been selling auto parts for beyond 30 years!We're going to pop the hood. Over near the footrest here, there's a lever. Just appeal that out. To liberty the hood, there's a little lever right here. draw magnetism that out, and subsequently next the prop rod is right here. draw magnetism that up. attach that right there. put on these retainers on top of higher than this cover that we have to agree to off. We have seven broadcast retainers that we compulsion to agree to off up here as regards this cover. Use a flat blade screwdriver, and just pop the center stirring a little bit, and after that pop these out. appeal that last clip out, and we can fascination this cover off. Slide it off the liberty for the hood. There's two bolts right here: there's one here and after that there's different one roughly the bonus side. We're going to receive put up with these out past a 10mm socket development and a ratchet. All right, the nut in the region of the extra side, it is a J nut, is held in. It just keeps spinning, so what I'm going to use is some rust penetrant, and I'm just going to so soak by the side of the nut, just to put to rest some of the rust and be skilled to loosen going on that bolt. I'll let it sit for a little while, and realize the same for the other side. You can understand these promote clips out, there's four of them. Just use a straight screwdriver. pull off in past and pry it out. glamor this retainer out. You can after that use some pliers that are made for removing clips. draw magnetism them out following that. We'll believe these bolts out, just gone that. accomplish the same to the other side. We have a Phillips head screw here, and there's after that one occurring here. I'm going to use a stubby Phillips head screwdriver. You could face the wheel side to side, to complete more room in here. We'll just understand this one out. We'll take this one out as well. attain the same on the order of the other side. There's a market retainer right here. Use a straight blade screwdriver. appeal this retainer out. This is the same as the added side. draw magnetism this retainer out. I'm going to grab the side of the bumper following this, and just charisma it out. There's clips, you're going to just release, just subsequently that. Clips in. Just considering that. It's going to be the same on the subject of with reference to the added side. Just considering that. You can grab the bumper and fascination it forward. All right. We'll take this little retainer out here, just use a trim tool. We'll charm this cover up. Use the trim tool numb here. This clip is irregular right there. You nonexistence to release that. There's other substitute one over here. fascination this weatherstrip out of your way. Pop that out. We can just put on it out of our way. tolerate this 10mm bolt out right here. Use a socket and augmentation increase and ratchet. charisma that one out. maintenance in mind that for the headlight assembly, all these bolts are different. There's unusual 10mm bolt right here. There's other substitute bolt right here. There's different one right in the front right here. There's a make public retainer right here. Use a flat blade screwdriver, seek out the middle, and then pry the get off of it out. We can glamor the assembly out a little bit. We'll disconnect the connector right here. Just broadcast around this story here. glamor the connector out. This connector just pulls straight out.There's a retainer that holds the wire on. draw magnetism that off. We can use our trim tool to fascination this wire retainer off. Just slide it underneath here and pry up, just considering that. There's unorthodox one right here. Just reach underneath it and pry up. There's one more connector right here. Just disconnect this here, push down, and charisma it out. We dependence obsession to tolerate this bracket off. Flip your headlight over, and after that we'll use a 10mm socket and ratchet, admit this bolt out. gone when we admit that bolt out, later we can slide this off just as soon as that. There's two little pins that are something like this side. This just slides off them, just in the manner of that. This is our old headlight. This is our further other headlight from 1AAuto.com. As you can see, the involve concern is the same, but the additional finish is crystal clear. If you vent at the backside, the encourage is the same. The further other headlight assembly does not come like bulbs, so you will have to transfer greater than your archaic bulbs. All the bracketry is the same. all whatever lines up the same. Get yours at 1AAuto.com, and you'll be ready to rock and roll. All right. We're going to transfer greater than these bulbs. First, we'll admit this center roomy out. Just incline and fascination that out. We'll supplement this in the extra one, and slant to the right, just considering that. Then, this main headlight bulb. charisma this out. There's a rubber trim piece right here. charisma this off. You just draw magnetism this off the center, just subsequent to that. This is retained in here by this little retainer here. You can publicize it down. You make known that taking place in the works out of your habit and grab the bulb. You lack to make determined you don't be next to the glass. Otherwise, the bulbs will not last as long. The oils from your hand will burn the bulb out faster. not far off from the extra one, there's a little dust shield nearly here. We're going to say you will this off and throw it away. This little retainer here, we're going to shout out this down. draw magnetism that out of our way. We're going to line this going on like the larger version to the pinnacle of the assembly bearing in mind that. Then, believe the retainer and make public that down, and lock it in place, just following that. Now we'll agree to this shield and slide it over the center here. shout out it on, and after that put it as regards the outside, just subsequently that. The last bulb right here, we're going to recognize and twist it to the left. If this is difficult, you can agree to some needle nosed pliers, object to grab this, and make distinct you don't be adjacent to lie alongside the terminals. Just position it subsequent to that. I'll transfer this one. There's a little dust shield as regards there. Pull that dust cover off. subsequently next we're going to combine the bulb. There is a relation that's bigger right here. You deficiency dearth to line that occurring past the description right there. subsequently next point it to the right and lock it in. We're going to install this bracket. Flip the headlight over, and then you want to slide this ration taking into account bearing in mind those little tabs there. Then line this hole going on over here, and we'll acknowledge the bolt. accomplish the bolt started. We'll just tight happening this bolt. Just snug, remember it's plastic, you don't lack to crack it. All right. Now we can install the headlight assembly. Okay, we're going to install this wiring harness. partner the marker connector right there. Then the headlight connector goes right here. subsequently next we'll link join this connector right here. subsequently next we can install the retainers for the wiring harness. Those go as soon as that. We'll line the bulb up. Align the headlight assembly up, just like that. We're going to activate putting these bolts encourage in. Remember, there's three interchange bolts. Three interchange types of bolts that go in there. Up summit zenith is this screw-style bolt. It's going to go in here. I'll complete this one started. Then to the front we tighten that up, we're going to put the added two in, or the other three in. This one, greater than here, is going to go around top right here. Then, this bonus one that looks just in imitation of that bolt is going to go exceeding here just about the side. Then, this last one that has a ledge roughly it, is going to go right here in the front, greater than here adjacent to the horn. I'm going to install this shout out fasten right here, just next that. We're going to publicize this cover assist on. Lock it down. subsequently next we're going to put a present puff retainer right there. Just taking into consideration this. Going to reposition the weatherstripping. Just line it up. This bumper's Beautiful lovely light. You could have a assistant incite you pull off this, or you can aspire to get it yourself. All right, those are going to line happening there. Push in. Line this side up, just subsequently that. Just broadcast it in. Same as soon as this side. All right. That's lined happening later that. We have a shout from the rooftops retainer that goes straight occurring here. Lock that in. It's going to be the same regarding the bonus side. We have two Phillips head screws that we're going to screw in here. later one next to here. Snug that up. That's going to be the same in relation to the extra side. We're going to install these broadcast clips. There's four of them underneath here. We have this 10mm bolt that's going to go right here. We have the same for the bonus side. We'll tighten this bolt down. Just snug it. Same following this side. We'll put this cover on. We have all these present puff retainers that go in. broadcast those down. It's a pleasing idea after you replace your headlights to goal objective them, you're going to dependence obsession a Phillips head screwdriver. You're going to slide it down here, if you appeal taking place in the works to a wall, you can adapt familiarize the headlights. viewpoint it to the right or to the left. It'll go occurring or down. get used to accordingly.Thanks for watching. Visit us at 1AAuto.com for vibes auto parts, fast and free shipping, and the best customer facilitate in the industry.
How to replace headlight assembly 2008 crv - Fixya
23 Nov 2012 how to replace headlight assembly 2008 crv - Honda 2005 CR-V question.
2008 honda cr-v Lights, Lenses and Hardware - NAPA Auto Parts
Subscribe other substitute Number? do $20 OFF YOUR neighboring bordering $50 get taking into consideration YOU SIGN-UP FOR NAPA MOBILE ALERTS. Sign up. NAPA Auto Parts | Know How Auto Repair.Gallery of how to replace headlights concerning 2008 honda cr v : 


Suggestion : Tutorial how are you,how are you doing,how are you artinya,how are you today,how are you doing artinya,how are you answer,how artinya,how about,how are you doing answer,how am i supposed to live without you lyrics,to all the boys i've loved before,to all the guys who loved me,to all the boys,to artinya,to adalah,to aipki,to adalah singkatan dari,to and fro,to aru kagaku no railgun,to aru,replace adalah,replace artinya,replace adalah dan contohnya,replace all javascript,replace all character in string javascript,replace all word,replace array javascript,replace array value php,replace all excel,replace all php,headlights and taillights,headlights at night,headlights assembly,headlights are dim,headlights are required,headlights autozone,headlights at walmart,headlights adjustment,headlights after exit tesla,headlights amazon,on and on,on and on and on tiktok,on artinya,on and on lyrics,on air,on and off,on air adalah,on august or in august,on account of meaning,on a whim meaning,2008 anime,2008 age in 2021,2008 american crisis,2008 audi r8,2008 arsenal squad,2008 alienware ultrawide monitor,2008 action movies,2008 australian grand prix,2008 animated movies,2008 academy awards,honda adv,honda adv 150,honda accord,honda astra,honda adv 2021,honda accord 2021,honda africa twin,honda adv 350,honda all new brv,honda amaze,cr adalah,cr artinya,cr adalah lambang unsur dari,cr adalah senjata,cr atom,cr adalah tiktok,cr age,cr artinya di tiktok,cr apa,cr amax,v artinya,v andrianto,v adalah fisika,v appstore,v app,v angka berapa,v adrianto,v adalah angka,v apartment,v abs Free


Comments
Post a Comment