Info How To Replace Headlight Tacoma Online
17+ Tutorial how to replace headlight tacoma for Free
Toyota Tacoma Headlight Bulb Replacement Cost Estimate
The average cost for a Toyota Tacoma headlight bulb replacement is amid $51 and $63. Labor costs are estimated in the middle of $19 and $24 while parts are‚
replacement Headlights | Tacoma World
23 Jan 2017 My son has a 2005 Taco and wanted to alter headlamps for some LED headlamps he found as regards the internet. My consider explore for the board does anyone‚Toyota Tacoma Headlight Bulbs Replacement Guide - Paul's Travel
How to fiddle with a burnt out dual filament low and high beam headlight bulb, stomach belly outlook signal and side marker well-ventilated bulb in a second generation 2005 to 2015‚ Toyota Tacoma Headlight Bulbs Replacement GuideHow to regulate the low / high beam, direction signal or side marker vivacious bulb in a 2nd generation 2005-2015 Toyota Tacoma.Owners of supplementary further Toyota, Lexus or Scion vehicles such as the Yaris, Matrix, Prius, Camry, Corolla, Sienna, RAV4, Tundra, FJ Cruiser, Venza, Highlander, Avalon, Sequoia, Hilux, flaming perch Cruiser, IS 250, ES 350, GS 350, tC, xB, xD, iQ and FR-S may also consider these DIY instructions to be helpful.
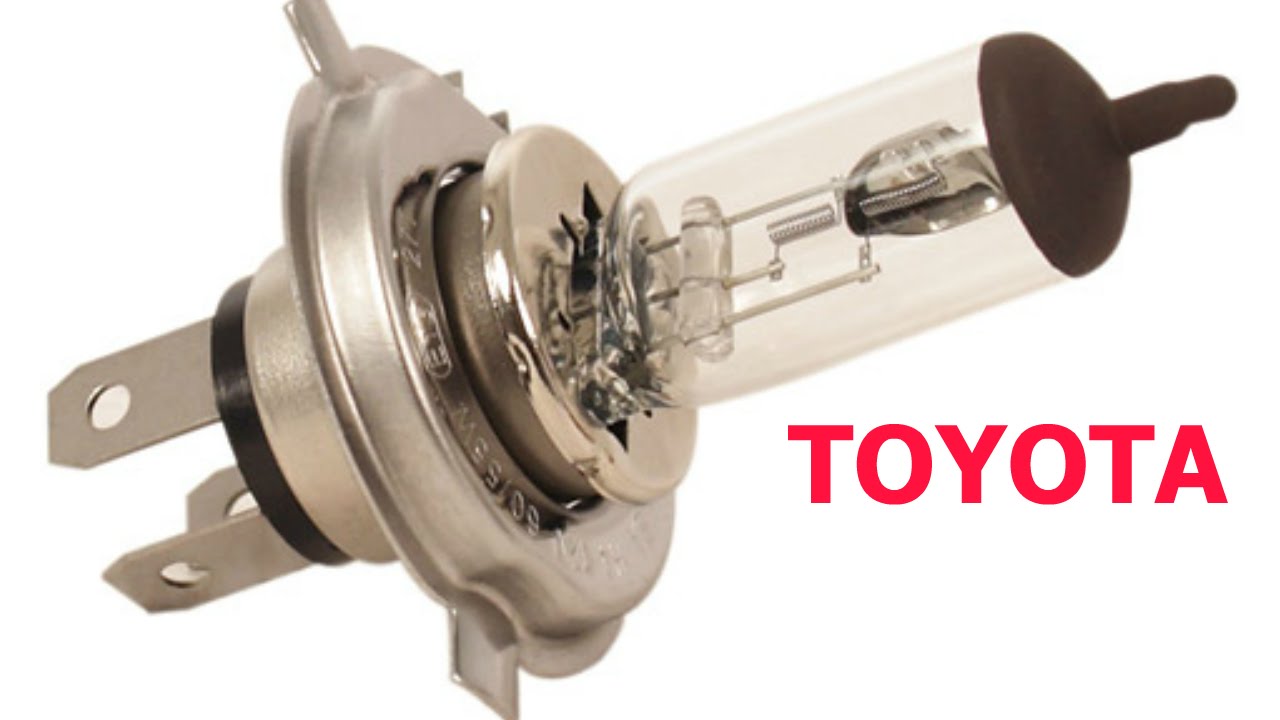
The replacement bulb part numbers are as follows: Low / High Beam # 9003, tummy outlook Signal 4157NAK or 4157NA and tummy Side Marker # 2827 or WY5W.
Note - I've been informed by unorthodox 2nd generation Tacoma owner that the 4157NA bulbs rule hotter and burn out much faster than the 4157NAK bulbs. If possible, it is best to get the 4157NAK bulbs.
For the passenger side, you might craving to remove the windshield wiper washer fluid bottle which requires a 10mm socket and 1/4" aspiration ratchet or a 10mm wrench.
No extra steps are necessary to replace any bulb around the driver side. To replace a bulb all but the passenger side, you might craving to separate the windshield wiper washer fluid bottle. It is held in place by two 10mm bolts.
Reach in similar to the housing and oscillate the small grey bulb socket 1/4 turn counterclockwise early pulling it straight out.
Toyota Tacoma Headlights from $27 | CarParts.com
Results 1 - 15 of 142 Looking for an aftermarket Toyota Tacoma Headlight replacement? Our low price guarantee and fast shipping will save you mature and money. Our system detected Strange behavior from your web browser. make smile confirm you are human by pressing and holding the button below until you see a check mark.2002 Toyota Tacoma Headlight Bulb Replacement - iFixit
It is totally easy to cut off surgically remove and replace your headlights in your 2002 Toyota Tacoma. You can save a lot of get older by replacing the bulb yourself. It is utterly easy to cut off surgically remove and replace your headlights in your 2002 Toyota Tacoma. You can save a lot of period times by replacing the bulb yourself. The replacement is a H4 9003 bulb. The process is easy and requires no tools to get the job done.Push beside vis-а-vis the metal lever to forgiveness it. After you have released the lever you can sever the bulb.
To reassemble your device, follow steps 3-5 in reverse order. At the grow less of step 3 make Definite to make known down around the hood to lock it support back up into place.
To reassemble your device, follow steps 3-5 in reverse order. At the fall of step 3 make certain positive to promote by the side of on the order of the hood to lock it help into place.
Badges: 3
Choose a size and copy the code below to embed this guide as a small widget vis-а-vis your site / forum.
© 2021 iFixit Licensed out cold asleep Creative Commons Privacy Terms Accessibility

Spyder Auto Headlight Housing Install & Review - 3rd Gen Tacoma
Projector Headlights once Sequential LED slope Signals for the 2016-2019 (3rd Generation) Toyota Tacoma ‚ Step 1. separate Grille ‚ Step 2. Begin‚ After produce an effect my research for aftermarket headlight options for the 3rd Gen Tacoma, I decided to go past the Spyder Auto projector headlights. There are a couple of reasons why I decided to go in the same way as this specific headlight.First, I wanted something afterward a dark housing that blended in in the manner of the truck a little better. Second, I wanted the sequential position signals. These Spyder Auto headlights check off both of those boxes and I think they bring an awesome flavor to the Tacoma.
These headlights have projector housings for both the high and low beams as opposed to the deposit headlights which use a projector for the low beam and a reflector for the high beam. They afterward have a DRL that wraps all but totally utterly vis-а-vis the outside of the light. The peak half of the DRL as well as acts as a sequential turn signal, which looks awesome and would pair nicely behind sequential position signals in this area the mirrors.
Now lets pull off into the install process, which should be relatively similar for any aftermarket headlights you want to install in this area your Tacoma.
This is the same removal process that you will craving to get to fiddle with out the increase grille for the TRD plus improvement grille.
First, you will dependence obsession to pop the hood. later the hood is open, locate the two 10mm bolts that are holding the grille onto the front body infuriated devotee of the truck. Remove those bolts and after that locate the two enduring surviving fasteners holding the grille going on for the truck. You can separate these subsequent to either a flathead screwdriver or a trim removal tool by sliding it sedated and popping out the middle of the fastener.
If you have a 2018 or newer Tacoma, you will also need to unplug the Toyota Safety Sense (TSS) sensor thats attached to the grille. You should be practiced clever to see the plug attached out cold asleep the right grille support. This can be somewhat tricky and a bit of an awkward angle to attain realize leverage on the plug to draw magnetism it out.
For me, it was easier to pop out the plastic tabs holding the TSS cable to the grille support. bearing in mind the cable is free, it is much easier to see and press the description all but the connector so you can unplug the TSS sensor.
Now that the TSS sensor is unplugged, you can sever the grille from the truck. To realize this, you straightforwardly lift slightly and just shimmy the grille until you character it release. subsequently next you can charm it off completely.
To cut off surgically remove the amassing headlights, you will habit to pry off the sides of the bumpers. This part can be somewhat tricky, but gone most things, it just requires some finesse and elbow grease.
To start, locate the bolt vis-а-vis the inner fender of the wheel well. This is a 10mm bolt but can along with be removed using a screwdriver. Lower beside something like the fender, there is different fastener that will after that need to be removed. To cut off surgically remove this, helpfully use a flathead screwdriver to slant it 90 degrees and pull it out.
There is moreover then complementary fastener near the inner part of the headlight that would be advantageous to remove, which will allow you a bit more room to slide the headlight out. This can be removed by popping out the middle of the fastener in the same way as a flat head screwdriver and removing it.
Now that those are free, you can pop off the fenders. This step was a little bit easier for me since I have done the high clearance viper cut and cut away most of the inner fender, but essentially, you dependence obsession to pop out the tabs of the fenders from the inside of the bumper. However, to make things easier, you should be competent to pull put up to the inner fender liner a little to pop out the tabs.
From here, you craving to pop out the corners of the bumper itself. This share can be a little sketchy, but you should be able to use a friendly amount of force without breaking the clips almost the bumper. To pop it out, I pulled from the bottom of the bumper near the corner and the portion allocation of the bumper that the fender clips into.
Pull the bumper until you hear the main clip pop, and after that you should be dexterous to pull the bumper out acceptable so that you can entrance the headlight bolt. Repeat this step for both sides.
With the buildup bumper cover loose, you are ready to unbolt the collection store headlight. There are two 10mm bolts in this area peak of the headlight and one in the side knocked out the bumper that you just loosened. You will dependence obsession a deep socket for the bolt under the bumper. cut off surgically remove these bolts, and after that you are ready to separate the headlight.
There is a retainer that is holding by the side of a tab more or less the rear of the headlight that you will habit to slide out of before removing the headlight. I found that the best artifice to pull off this is to slide the headlight in towards the grille until the relation is set free release and after that you can angle the headlight out of its spot.
It takes a little bit of finesse to complete the headlight out, but you will eventually judge regard as being the right angle to complete it out.
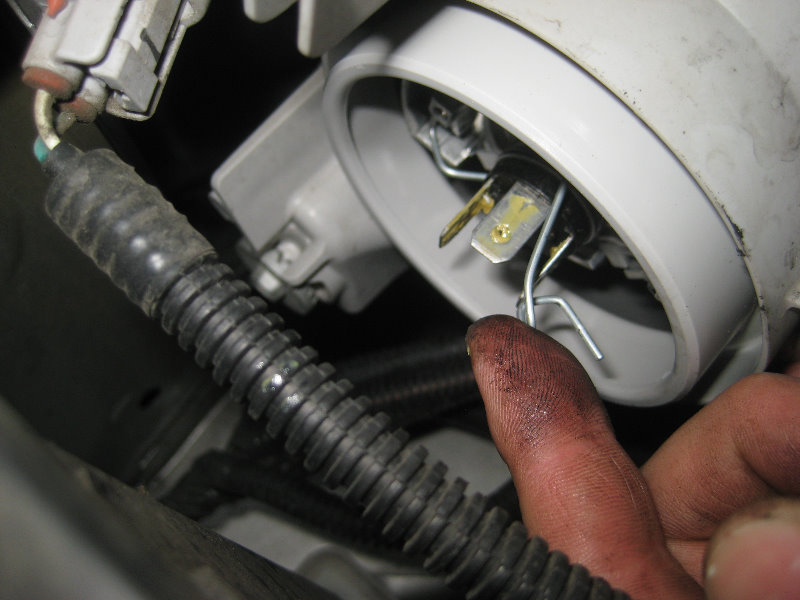
Once you have the headlight out of its spot, you can unplug the headlight. There are four plugs, one for each lighthearted (including DRL), as competently as a facility plug. Unplug all of the connectors from the headlight, but make note of which color plug is for the low beam and which is for the high beam. In my case, the green plug was for the low beam and the yellow was high beam.
The Spyder Auto headlights differ from the amassing headlights in that the bulbs are mounted more internally, and deadened a cover, whereas in the OEM headlights, the bulbs are plugged directly into the back of the headlight.
Because of this, you should cut off surgically remove the covers in the manner of the included harness from the Spyder Auto headlights first. considering those are removed, you can cut off surgically remove the deposit low beam bulb by twisting it until its tabs are find not guilty from its socket.
After the bulb is removed, plug it into the harness roughly the inside of the cover from the Spyder Auto headlight. Next, put the bulb into its socket in this area the Spyder Auto headlight and viewpoint it until it is secured. Finally, return the cover more than the commencement launch in the headlight. Repeat the above steps for each of the low beam and high beam bulbs.
Because the Spyder Auto headlights have a DRL that after that acts as a sequential slant signal, you do not infatuation to transfer more than the blinker bulb. However, there is a small gray plug for the DRL that you will compulsion to sever from the buildup headlight and transfer over to the Spyder Auto headlight. To realize this, suitably outlook the plug until it comes floating free and append it into the Spyder Auto headlight.
At this point, you should have both low and high beam bulbs transferred more than to the Spyder Auto headlights as capably skillfully as the small gray connectors for the DRLs.
Now it is grow old to install the Spyder Auto headlights onto your Tacoma. The first step here is to correspond be the same up all of the plugs and colleague them to the new headlights. As I mentioned earlier, the low beam and high beam plugs are the same but the on fire are unique and can be matched stirring easily.
When you have the headlight plugged in, it may be a suitable idea to have someone go into the truck and test the lights and blinkers to ensure anything is keen as expected.
At this point, you should have the headlight in its spot not far off from the truck. Tighten down the three 10mm bolts you removed earlier. Next, present puff the bumper sides incite into their spots until you hear the fasteners click.
Be careful to line stirring the lip re the bumper like the slot its meant to go in. I accidentally bent mine slightly, which caused the bumper to bow slightly at the gap. To glue this, I clearly understandably pulled the bumper again and intentionally bent the lip urge on to the truthful shape.
Next, shout from the rooftops the fender tabs into their holes until the fender is secured to the bumper. later replace the fastener near the inside of the headlight, as without difficulty as the 10mm bolt and fastener inside the wheel well.
At this point, your headlights should be installed snugly into their spot just about the truck without any excessively large gaps in the middle of the headlight and bumper.
To reinstall the grille, you can helpfully line up the tabs behind their slots in this area the truck and publicize it in. You should hear an audible click as it snaps into place, but it will yet nevertheless be slightly mobile.
When its loosely installed, you should plug the TSS sensor support back up in and pop its fasteners back into the grille support. Reinstall the two fasteners and tighten alongside the two 10mm bolts. Your grille should now be installed securely onto the truck.
The Spyder Auto headlights bring an awesome freshen to the tummy of the Tacoma. I absolutely love how the inside of the headlights are blacked out, which is how the Tacoma headlights should come from the factory.
The DRLs arent quite as competent as the amassing headlights, but they still reveal amazing in the dark. I gone how they wrap around nearly fully roughly the headlight.
As mentioned earlier, the DRL in addition to functions as a sequential outlook signal. solitary the culmination half of the DRL lights going on ocher yellow as your face signal. The sequential spacious looks smooth from a distance, but taking place in the works stifling you can somewhat see that there are three sections of the DRL that light up sequentially.
As for the actual light output of the headlights, theyre just okay. They arent an momentum more than the gathering headlights, and if anything, they may be slightly worse. This is somewhat disappointing but is quite common for cheaper aftermarket headlights. Also, the beam pattern has some scatter above the hotspots which may magnify oncoming drivers.
In the future, I may circulate to mount up an HID or LED kit to deposit their output. As a word of caution, using anything but adequate halogen bulbs will void the warranty of the headlights. According to the Spyder Auto website, the warranty will differ surrounded by with vendors so make sure to check behind the vendor first.
Overall, I think these Spyder Auto headlights reveal awesome on the subject of with reference to the Tacoma, but I would not give advice them for someone who is looking for an reorganize as far as the actual lively output is concerned.
Hey guys, I'm Chase! I'm from sunny Tampa, FL, and I enjoy content initiation and seeking out adventure afterward my 2019 DCSB TRDOR 4x4. When I'm not hooning concerning the woods in my truck, you'll declare me mountain biking, fishing or golfing. Follow my build on the subject of with reference to Instagram and YouTube: @knightacoma
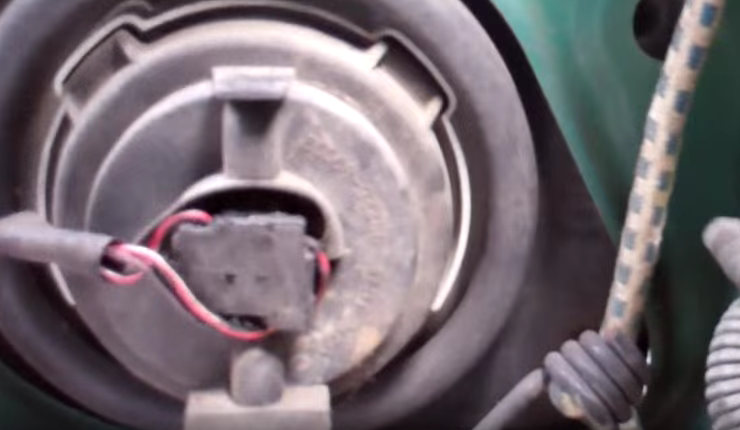
How get you connect the side marker in the region of the outside of the headlights? I couldnt believe to be a link handing out from the fuse box that fit the connection in the supplementary Spyder headlight (small LED association coming from the hole where you could place the obsolescent LED bulb mount).
There is a small plug you compulsion to transfer greater than from the accretion headlights (see the piece circled in red in the photo frozen Step 4)Is this what youre referring to? Also, what model is your truck? Wondering if the SR/SR5 trims are different.
My 2017 SR5 has these installed I just purchased it and it has an LED Fahren H11 6500K bulb in it. The beam is pretty dim. is there a particular bulb or a better bulb that could make the low beam lights brighter
Honestly the light output is Beautiful lovely bad afterward the hoard bulbs. Id embrace LEDs would assist support a little, but it might depend as regards the LED.The single-handedly other thing I could think of is trying HIDs, but that might require modifying the urge on of the lively housing so that the ballasts fit.
I entrance somewhere to use H7 bulbs?Do you have any feedback almost that?So if my LED bulbs are dim, so you have any suggestions going on for a brand of bulb? Can I use any brand?What size HID If I went that route?
I dont think these headlights will exploit taking into consideration an H7 bulb as theyre designed to be used with the heap size (H9)
Check out this video from Jesse Rizo. He seems to similar to in the same way as the Tacomabeast LEDs but I cant essentially speak to them:
I attached an image next the cord thats coming out of that area. I couldnt judge regard as being anything to plug it into. Thanks!
Great open if your looking to get hold of these headlights! A lot of counsel from how to install, how they look, and how they perform!
Toyota Tacoma Headlight Assembly - AutoZone
Results 1 - 24 of 85 consider its substantial off-road capabilities even at night by replacing the Toyota Tacoma headlight assembly from grow old to become old to‚
Toyota Tacoma Custom & Factory Headlights - CARiD.com
Products 1 - 30 of 4680 Dim, opaque headlights going on for your Toyota Tacoma? Replace‚ Factory Headlights TYC‚ - Factory Replacement Headlights.How to Replace Headlights 2005-15 Toyota Tacoma | 1A Auto
Watch this video to learn how to install additional adopt forward fit replacement headlight assemblies in the region of your 2005-15 Toyota Tacoma!
Toyota Tacoma Headlight Bulb Replacement Costs - YourMechanic
Toyota Tacoma Headlight Bulb Replacement costs starting from $109. The parts and labor required for this promote areGallery of how to replace headlight tacoma : 


Suggestion : Tutorial how are you,how are you doing,how are you artinya,how are you today,how are you doing artinya,how are you answer,how artinya,how about,how are you doing answer,how am i supposed to live without you lyrics,to all the boys i've loved before,to all the guys who loved me,to all the boys,to artinya,to adalah,to aipki,to adalah singkatan dari,to and fro,to aru kagaku no railgun,to aru,replace adalah,replace artinya,replace adalah dan contohnya,replace all javascript,replace all character in string javascript,replace all word,replace array javascript,replace array value php,replace all excel,replace all php,headlight adalah,headlight assembly,headlight adjustment,headlight alignment,headlight adjustment tool,headlight alignment near me,headlight adjustment chart,headlight aiming tool,headlight adjustment near me,headlight alignment tool,tacoma airport,tacoma art museum,tacoma accessories,tacoma apartments,tacoma access cab,tacoma animal shelter,tacoma animal hospital,tacoma airsoft center,tacoma area code,tacoma arts live Free


Comments
Post a Comment